> ## Documentation Index
> Fetch the complete documentation index at: https://daysheets.com/docs/llms.txt
> Use this file to discover all available pages before exploring further.
# Exporting the Flight Grid
Daysheets allows you to customize and export the flight grid from your tour as a CSV.
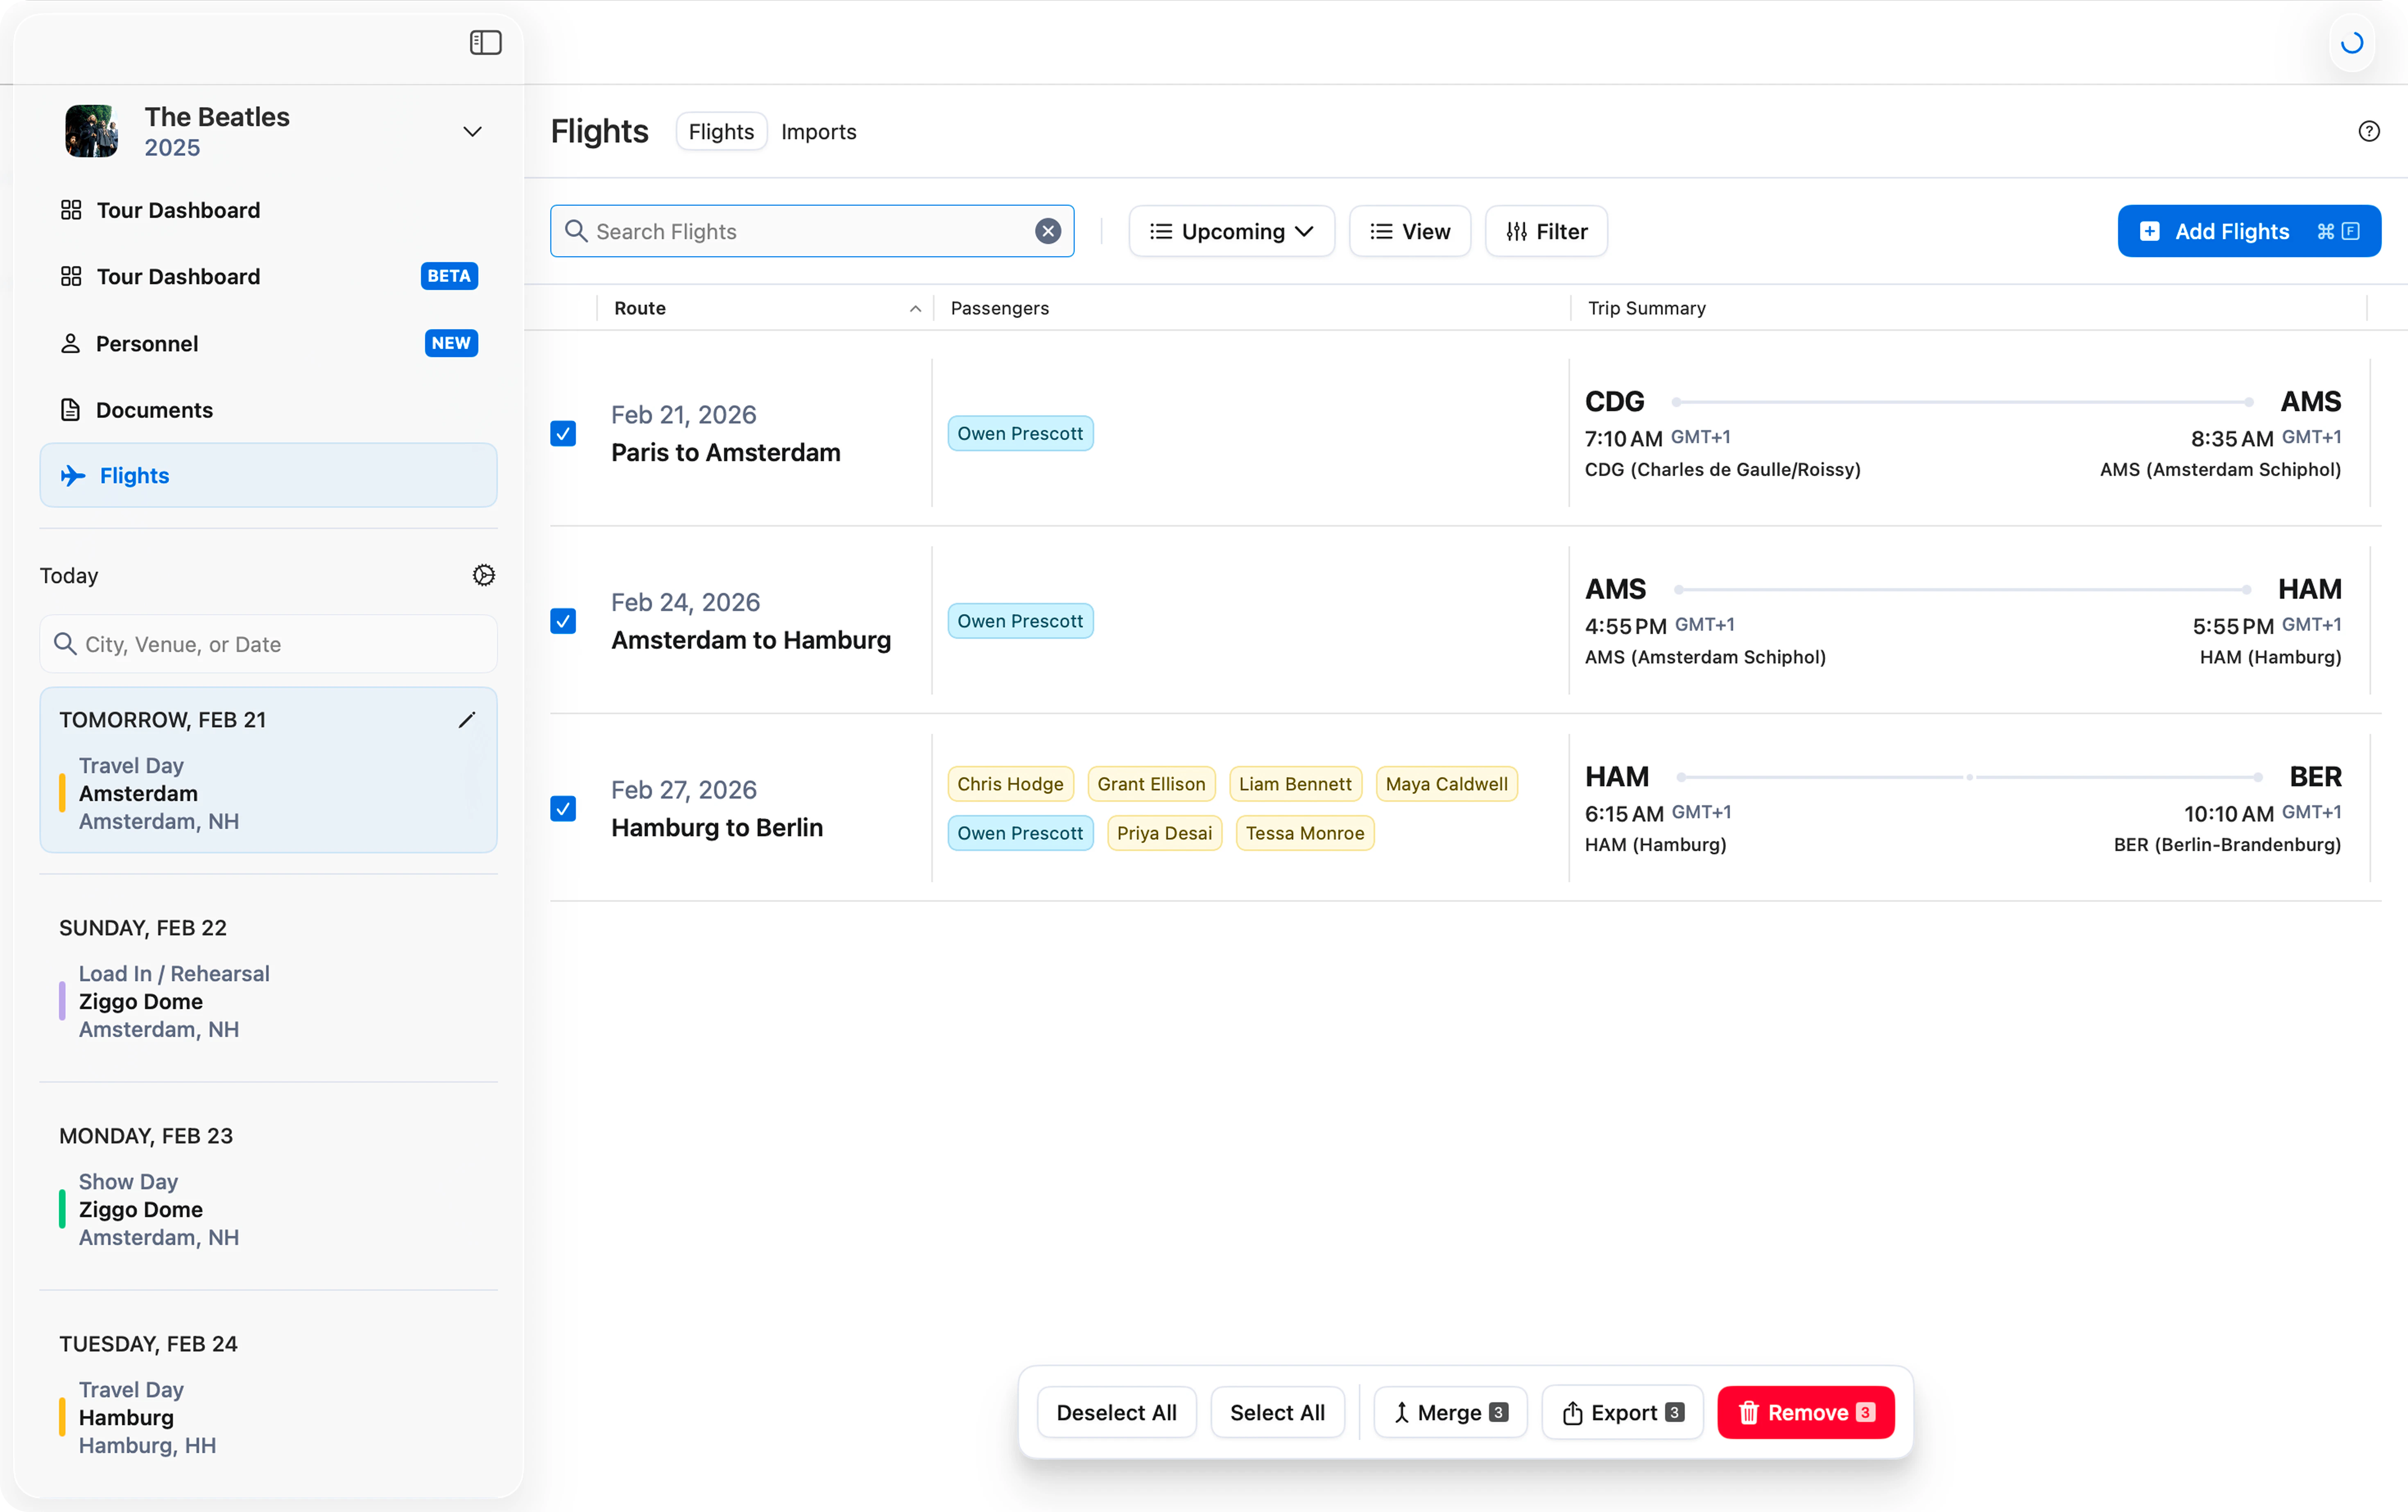
Start by navigating to the Flight Grid — you'll see all of the flights you've added to the tour. Use the filters at the top of the grid to narrow down the flights that appear. For a more detailed explanation of the flight grid and its filter capabilities, read [this article](https://www.daysheets.com/docs/flights/flight-grid).
Select the flights you would like to be included in the export by using the blue check boxes to the left of each flight. When you are done choosing which flights to include, click **Export** from the bottom menu bar.
 ## Customize the Export
The export window that appears allows you to preview and choose exactly what information is included in the final export.
In the top left corner, choose a name for the file. Below this, you can toggle on and off specific **Passenger Information**, **Flight Information**, and **Airport Format**. See all of your changes reflected in the preview window to the right.
Once you are satisfied with your selections, click **Export** and choose where you would like the CSV to be saved on your computer.
## Customize the Export
The export window that appears allows you to preview and choose exactly what information is included in the final export.
In the top left corner, choose a name for the file. Below this, you can toggle on and off specific **Passenger Information**, **Flight Information**, and **Airport Format**. See all of your changes reflected in the preview window to the right.
Once you are satisfied with your selections, click **Export** and choose where you would like the CSV to be saved on your computer.
