Editing Your Routing
Click Edit Tour on the right-hand side to begin modifying day types and locations for each date on your routing. Each date on your tour can have a day type, a location, and association tags that determine which groups will see that event.Select a Date
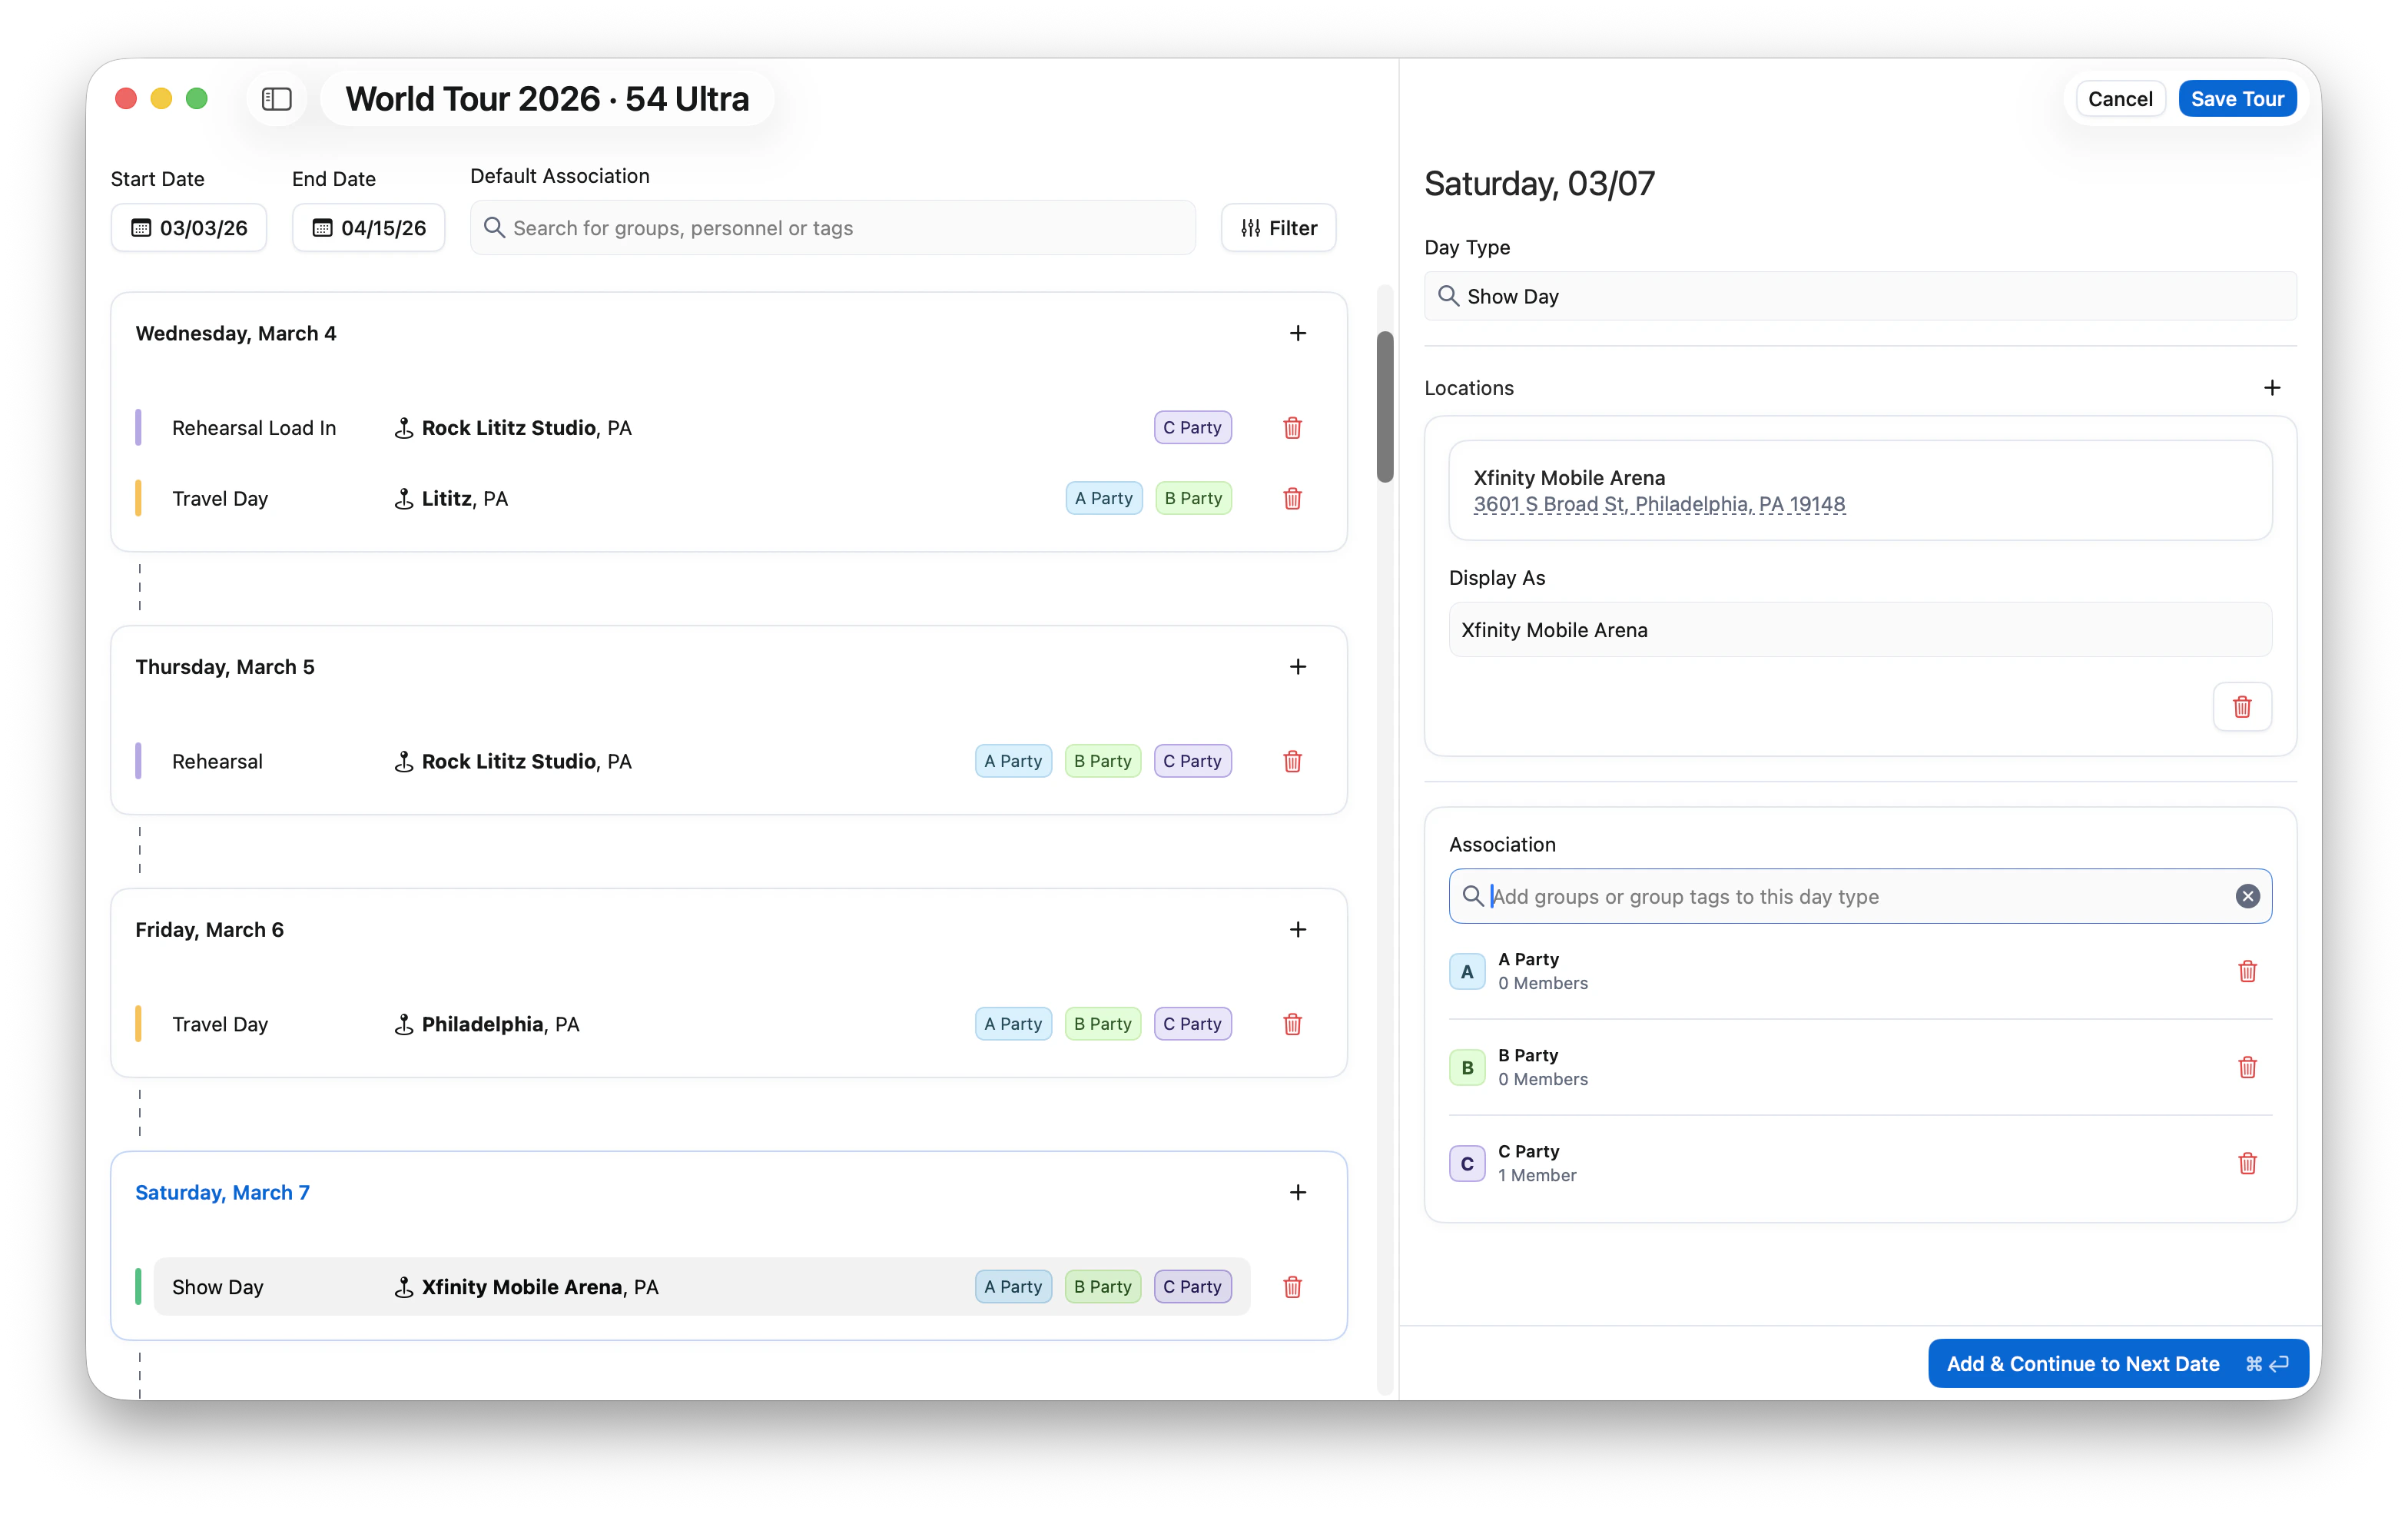
Choose a date from your routing to begin editing. The selected date will display fields for day type, location, and association.
Choose a Day Type
Enter a day type for the selected date, such as Show Day, Rehearsal, Travel, Day Off, or Load In. Day types are completely customizable — you can enter anything you’d like, such as Festival Day or Press Day.
Daysheets color codes day types based on keywords in the name. Rehearsal appears in purple, Show appears in green, and Off appears in blue. Daysheets is currently working on full color customization for day types.
Add a Location
Search for a venue, city, or address in the Location field. Locations are powered by Google Maps, so any location you can find on Google Maps will be available in Daysheets.
Google Maps keeps venue names up to date automatically. If a venue has recently changed names, the updated name will appear in your search results. You can adjust the display name to reflect what your team expects to see.
Tag Association (Optional)
Use the association tags to assign this day type and location to specific groups, such as A Party, B Party, or C Party. If you don’t tag an association, the event will show up for everybody on the tour.You can also tag Group Tags for departmentalization. For example, tagging Audio will display that event for the entire crew but will specifically indicate that it pertains to the audio department.
Adding Multiple Events on the Same Date
Some dates may have more than one event or location. For example, you might have a show at one venue and an after show at another. You have two options for handling this. You can add multiple locations to the same day type by clicking the plus button on the location field. Alternatively, you can click the plus button on the navigation to add an entirely separate day type for the same date, each with its own location and association.
How Association and Visibility Work Together
Association tags control what each group sees when they log into Daysheets. When combined with your Visibility and Permissions settings, they determine the experience for each team member. For example, if February 15th has a Travel day tagged to the C Party (crew) and a Day Off tagged to the A Party (artist) and B Party (band), crew members will only see the travel day, while artist and band members will only see the day off. To learn more about how visibility and permissions interact with association, visit the Visibility & Permissions guide.Keyboard Shortcuts
The Tour Builder supports several keyboard shortcuts to speed up your workflow:- R then Return — Quickly add a Rehearsal day type. Daysheets will assume the same location and association tags as the previous entry.
- Command-Return — Save the current entry and advance to the next date.
- Plus button — Add an additional day type or location to the same date.