Create Your Account
- Once you’ve downloaded Daysheets, if you don’t already have an account tap Get Started, then tap Continue. You’ll be redirected to the web to create an account.
- Enter your email address and password, or sign up with a social login. Tap Continue to be redirected back to Daysheets.
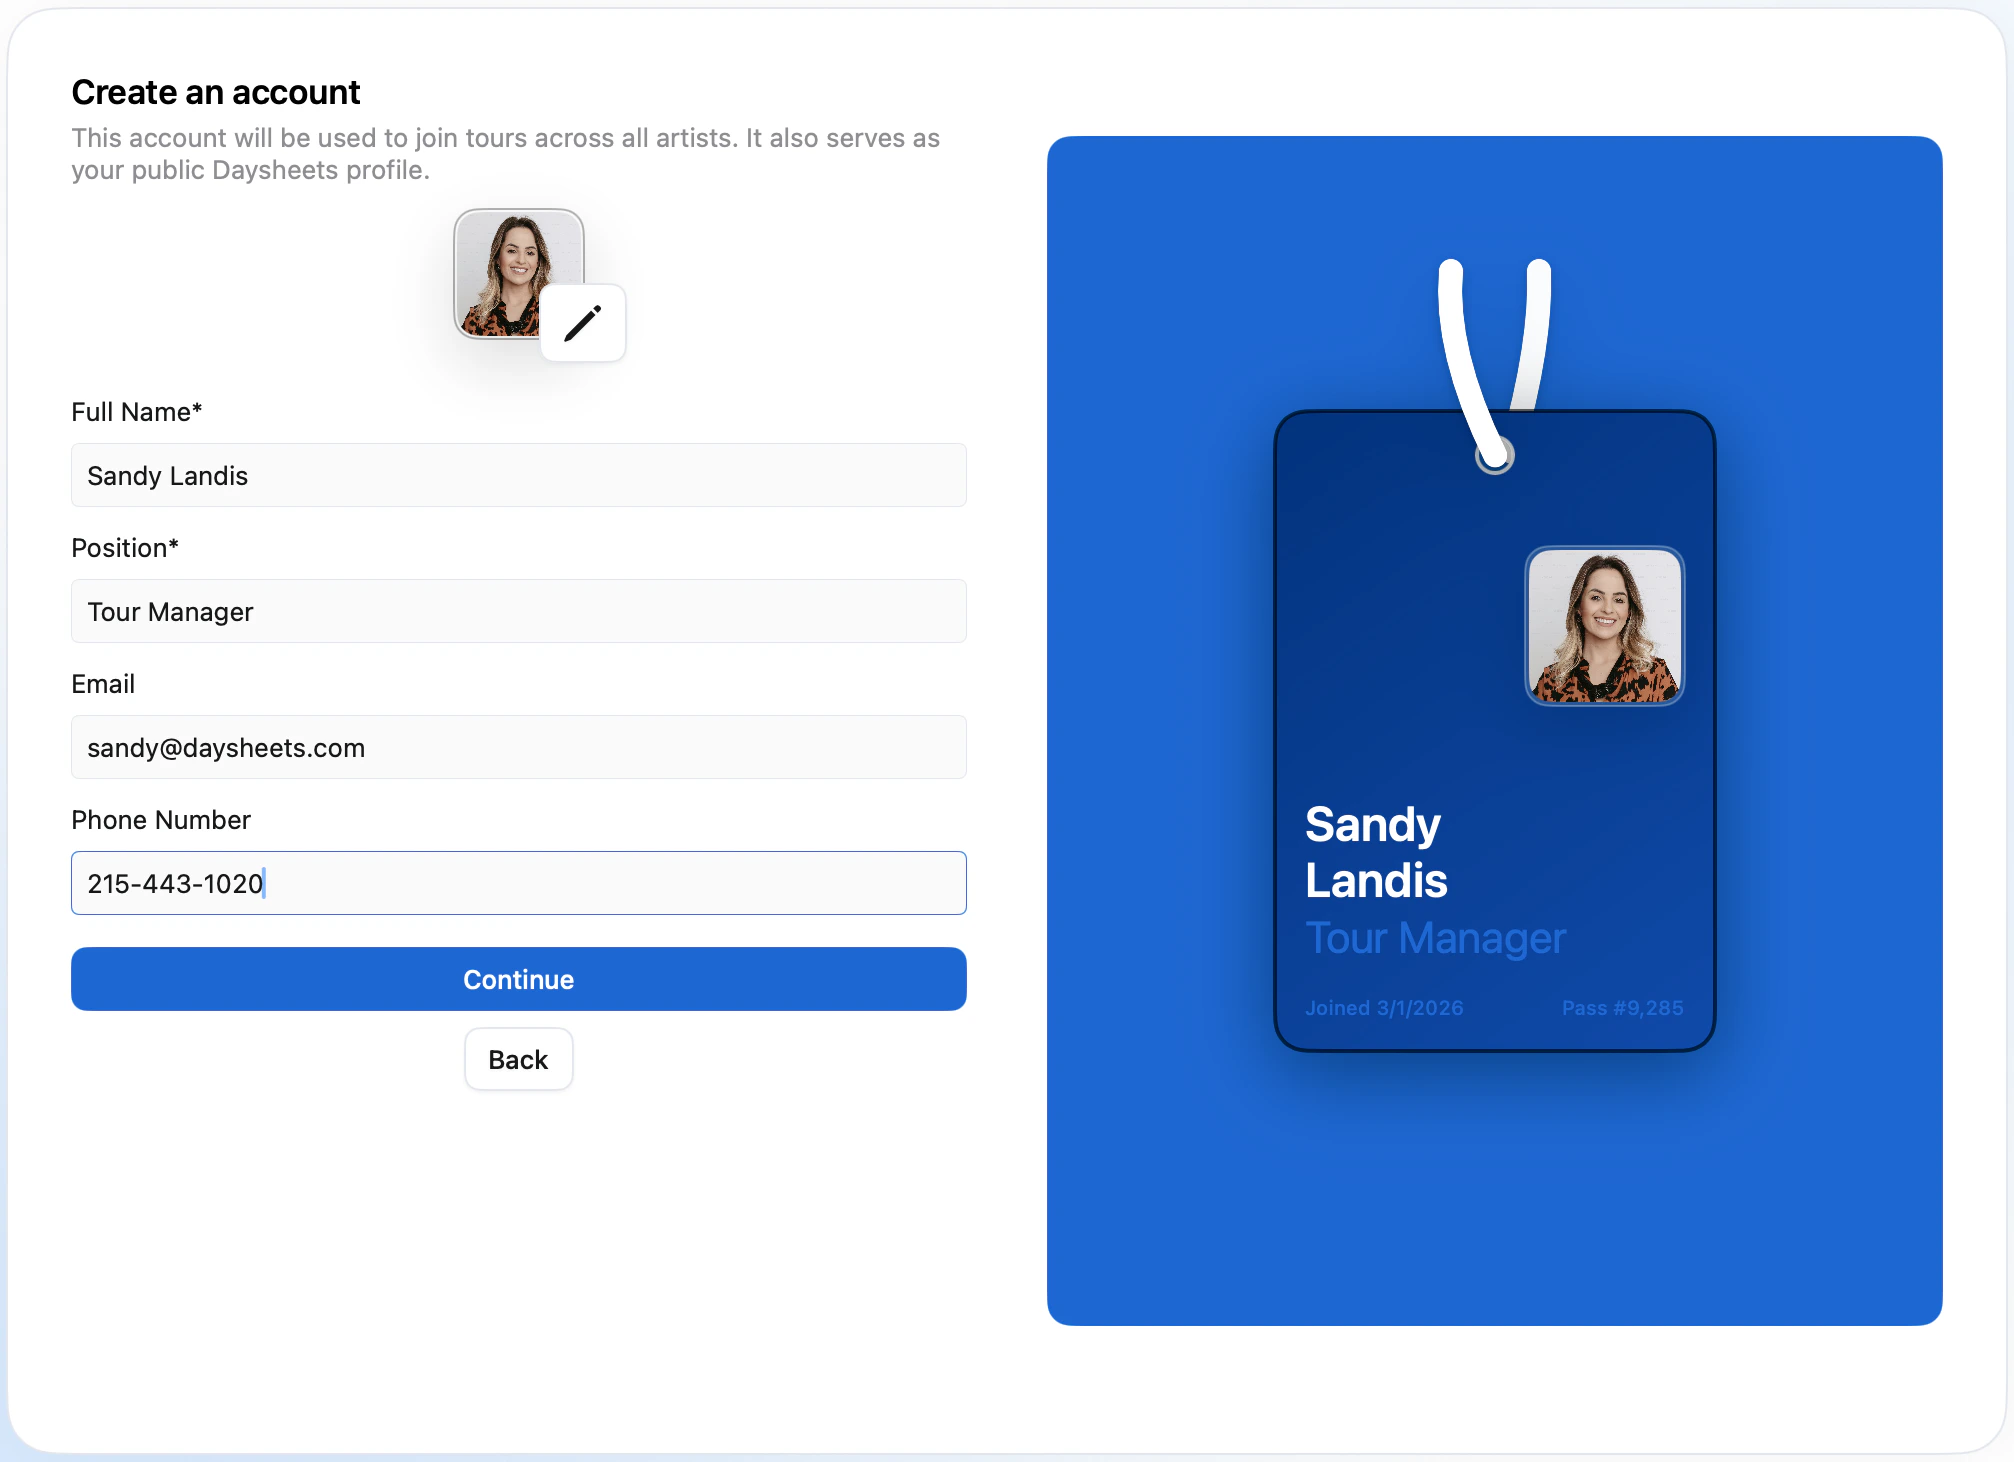
Set Up Your Profile
- Enter your name and select your position. As you fill in your details, you’ll see the All Access Pass populate on the right side of the screen.
- To personalize your profile you can upload a an optional profile photo, email and phone number.
- Tap Continue.
Choose Your Role
- Select how you’ll be using Daysheets:
- Artist Administrator — Choose this if you’ll be creating and managing tours. You’ll see options to join an existing tour if you received a Pin, or create a new tour.
- Tour Member — Choose this if you’ve been invited to join a tour and received a pin.
Create a New Tour
Tap Create a New Tour, and use the Spotify find the artist you want to create your first tour with. If your artist doesn’t appear, scroll to the bottom of the search results. Select your artist. You can update the artist image from here if needed, then tap Continue. Enter the tour name, set the start date and end date, and select how many people are in your travel party. Tap Continue.Set Up Groups
If your tour has more than 20 personnel members, we reccomend using groups. Groups allow you to tag schedules and reservations with different groups to create personalized itineraries. We give you three suggestions to add to your tour. You can create an A Party, B Party, and C Party by clicking on the the tags. To create different groups (like Management or Drivers), enter the group name, initial, and tap Create. Tap Continue when your groups are set.Create Group Tags
Group tags are subgroups within your groups. For example, you can add Band and Dancers to your B Party, or tags like Audio, Video, and Lighting to organize your crew by department. Once you’ve added optional group tags, press Continue when you’re done.Add Your Routing
Start by adding your first day. Enter a day type (like Travel Day) from the dropdown — you can search existing types or create a custom day type. Then move to the location search field to add a location. Daysheets allows you to search globally for venues and cities using Google Maps. Search for the locations using the entry field below Locations.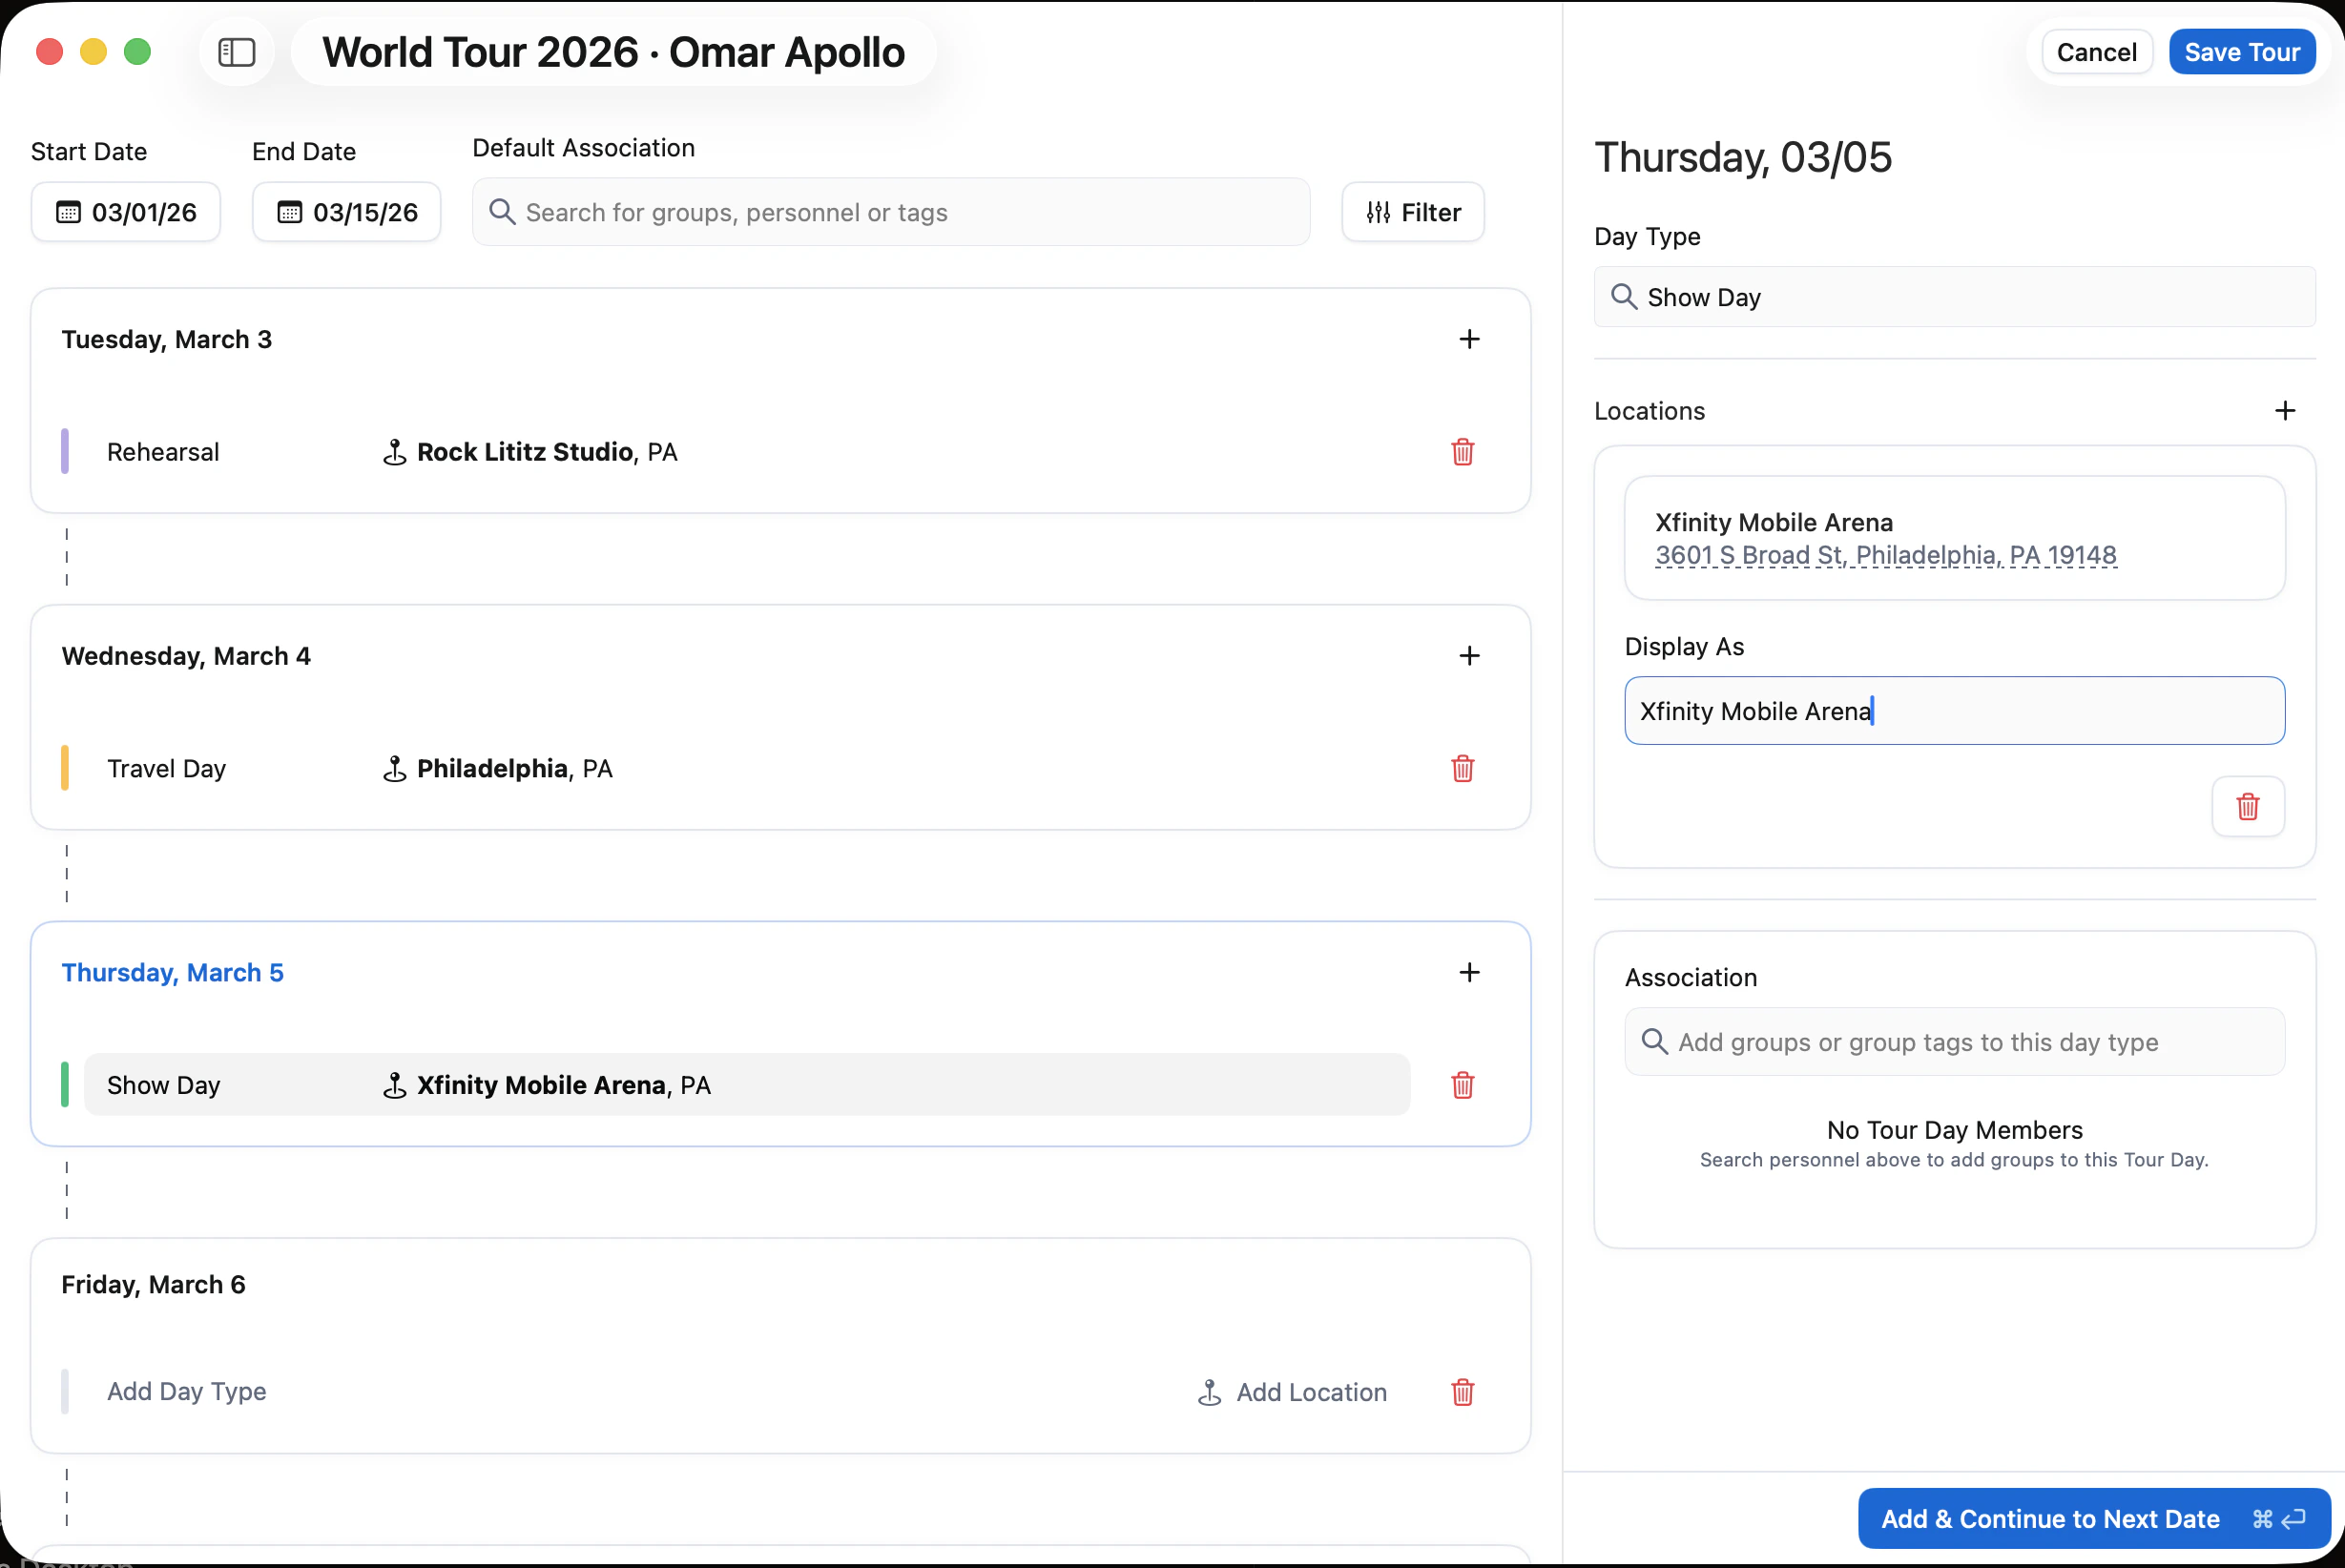
If you are entering a festival, or can’t find your location with a Google search, you can enter an address, and then rename the location in the Display As field.